The love of automation testers, TestNG, is a Java testing framework that can be used to drive a Selenium automation script. When it comes to automation, no one can compete with Selenium. If you are planning to dive into the field of automation testing, TestNG can be right for you. For a beginner, it can be difficult to determine a good starting point, so in this blog, we have come up with a step-by-step method to assist you in getting started with your first automation test script.
Create TestNG Test Case Using Selenium Webdriver
Let’s follow each of the steps one by one. We assume that you have a working installation of the Eclipse IDE and the TestNG plugin.
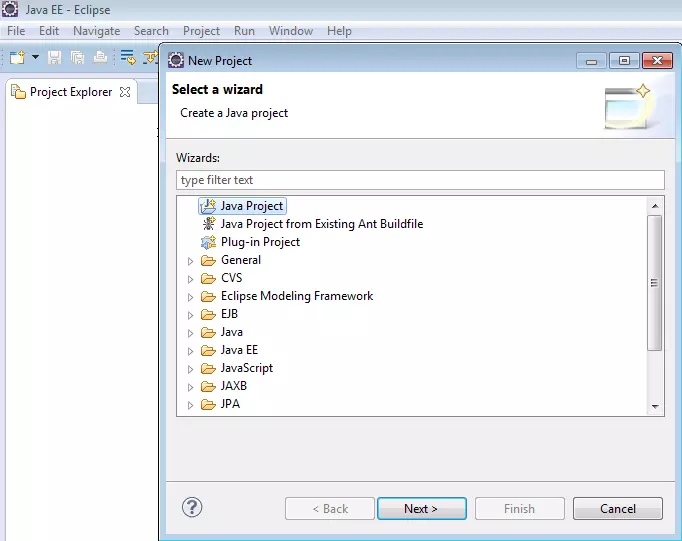
1- Create a new Java project in Eclipse to write your TestNG test case
You need to start the Eclipse IDE and choose to create a new Java project to write the first TestNG test case. Name the new TestNG project as the <TestNGSeleniumDemo> and press the Finish button for successful project creation.
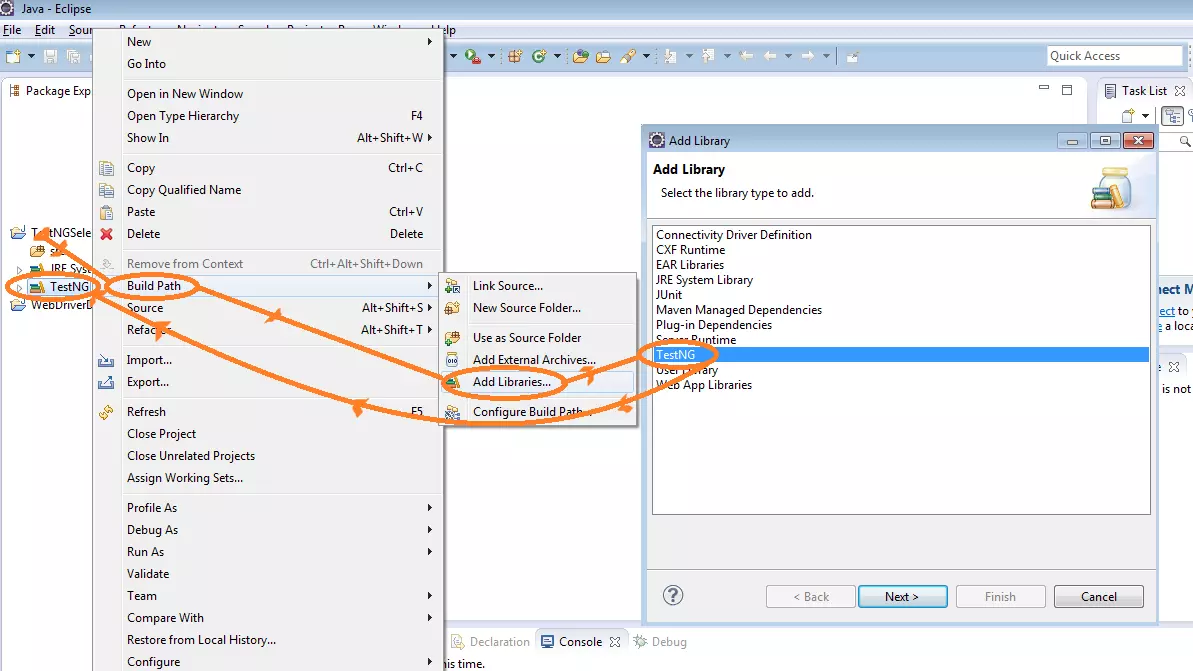
2- Add the library to your Java project
Here are the steps to introduce the <TestNG> library. Right-click on the project icon to open the context menu and click the “Build Path >> Add Library” option. It’ll open up a dialog listing all the installed libraries. Choose the <TestNG> option to add it to your project.
3- Create a new package in your project
Right-click on the project icon and select the “New” option to create a package as <com.techbeamers.testng>.
4- Adding a TestNG class
Right-click on the newly created package and select New >> Other.
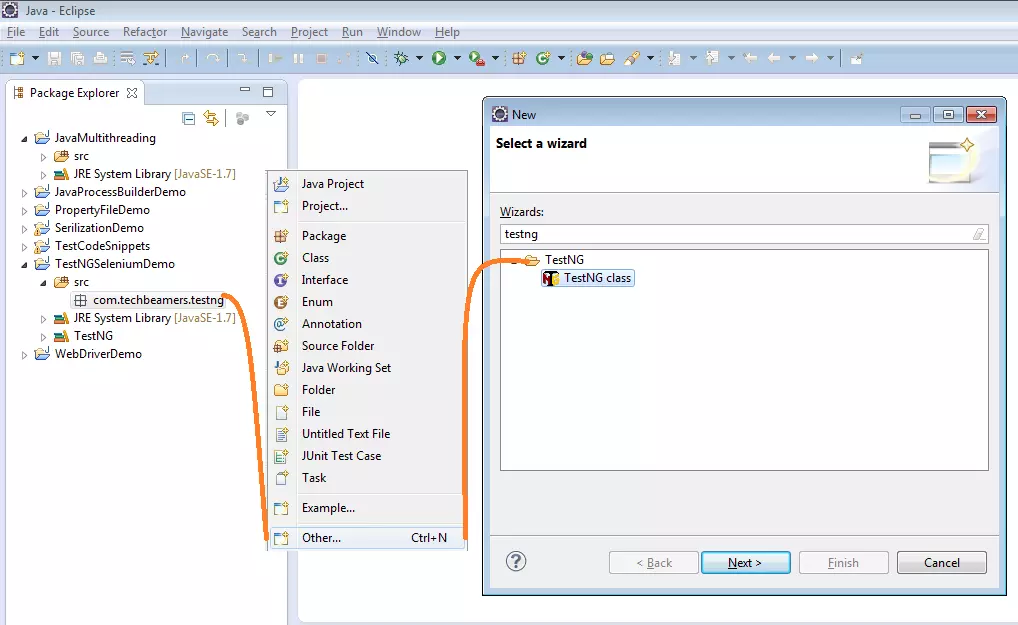
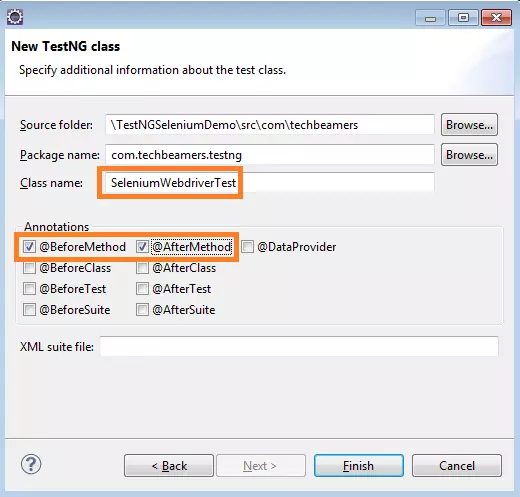
You’ll now see a TestNG class dialog like the one shown below.
- Here you must give a name to the new TestNG class as <SeleniumWebdriverTest>.
- Then, select the <BeforeMethod> and <AfterMethod> checkboxes available on the dialog box.
- Finally, press the Finish button to create the class.
After this, the Eclipse will auto-generate the TestNG class code. But there’ll be errors in the code because of missing package imports. We are giving you a solution to this issue. You must remember it as it is one of the crucial steps which as you’ll need later as well.
5- Adding Selenium Webdriver’s Standalone Jar to your project
You should be careful while adding the Selenium Webdriver jar file because the file must be compatible with the version of the browser (Firefox) you’ll use for testing. For this demo project, we’ve downloaded the latest version of the jar (2.53.0) file from the Selenium website. And we’d the most recent version of the browser (i.e. Firefox 45) which works well with the downloaded jar file.
6- Write a TestNG test case script using Selenium Webdriver API
We’ve given the full source code of the TestNg test case script. You can directly copy it to your project’s <SeleniumWebdriverTest.java> file. You can change the name of this file, but then you would also need to make the same modifications in the below source code. Here we are automating the test case scenario mentioned earlier, click the <test case description> link to check it.import org.openqa.selenium.By;
import org.openqa.selenium.WebDriver;
import org.openqa.selenium.WebElement;
import org.openqa.selenium.firefox.FirefoxDriver;
import org.testng.annotations.AfterMethod;
import org.testng.annotations.BeforeMethod;
import org.testng.annotations.Test;
public class SeleniumWebdriverTest {
WebDriver driver = new FirefoxDriver();
@Test
public void MyFirstTestNGTestCase() throws InterruptedException {
String title = driver.getTitle();
System.out.print("Current page title is : " + title);
WebElement user = driver.findElement(By.id("user_email_Login"));
user.sendKeys("abc@gmail.com");
WebElement pwd = driver.findElement(By.id("user_password"));
pwd.sendKeys("your_password");
WebElement signin = driver.findElement(By.name("commit"));
signin.click();
Thread.sleep(1000);
System.out.print("n'SUCCESSFUL EXECUTION!!!");
}
@BeforeMethod
public void startFireFox() {
driver.manage().window().maximize();
driver.get("https://www.browserstack.com/users/sign_in");
}
@AfterMethod
public void cleaupProc() {
System.out.print("nBrowser close");
driver.quit(
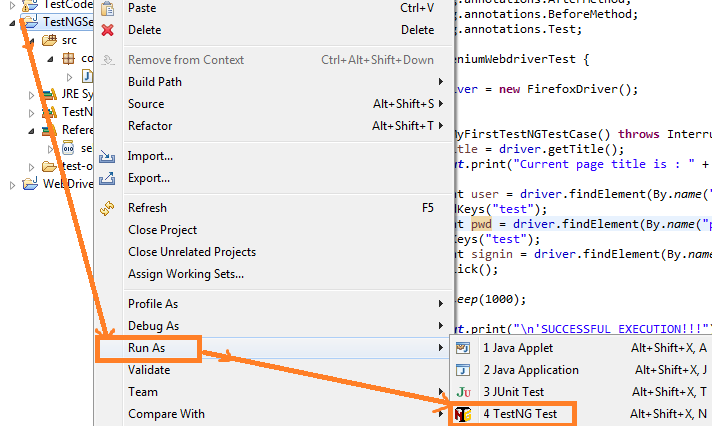
7- Run the TestNG Test Case and View Test Execution Report
You can easily run any of the TestNG test cases. Just right-click on the TestNG project icon, click the “Run as >> TestNG Test” option to execute the script. Check out the below snapshot for more info.
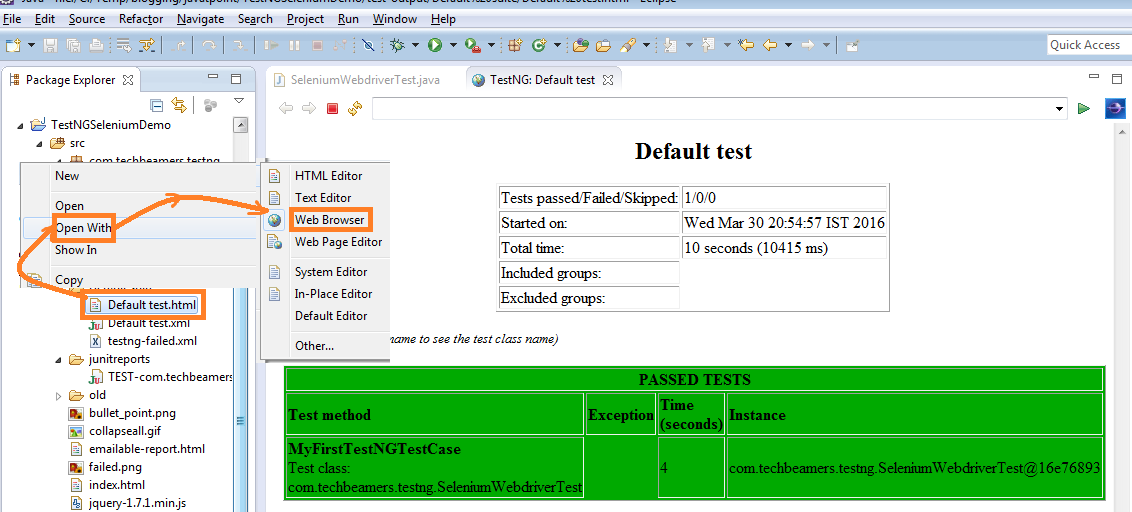
When you run the test case, it creates a <test-output> folder which contains a folder named as the <Default suite>. Here the TestNG project report is available in the <Default test.html> file. You can load the report in Eclipse by opening it in the web browser mode. For more clarity on viewing the test execution report, refer the attached picture.
Stay tuned and Happy TestNG!